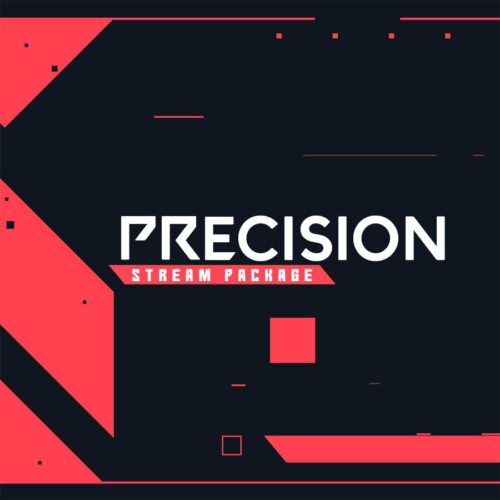
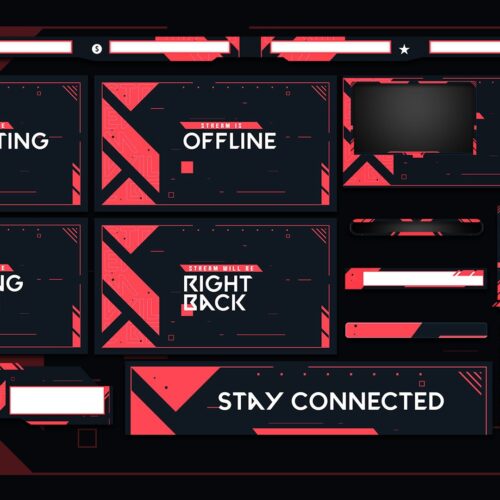
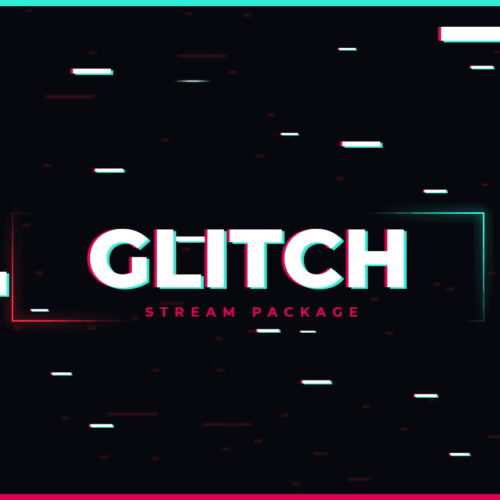
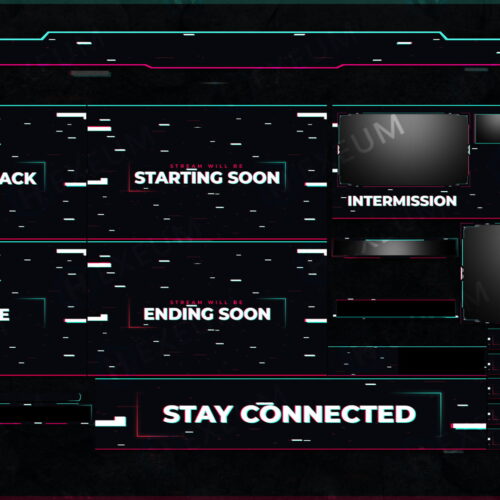
One of the best ways to give your stream a fresh and unique look is adding overlays to broadcasting software, such as OBS. Animated overlays and graphics are a core part of every top streamers branding. They add a level of professionalism that help you stand out in an increasingly competitive industry.
OBS is a powerful, free & open source software you can download to your desktop. It’s catgeorised as broadcasting software, and is considered one of the essential tools a Twitch streamer needs. With this software you can add all sorts of overlays, graphics, text, alerts and events to your stream. However, it can be a pretty daunting piece of software when you’re just starting out. We’re going to show you step by step how to you can add overlays to OBS in just a couple minutes.
Further on in the article we’ll also show you exactly where to get the best overlays, which are optimized & designed specifically for use with OBS.
Overlay types in OBS
An important note before we start. There are 4 different types of overlays OBS supports:
- Animated Overlays
- Image Overlays
- Text Overlays
- Browser Source Overlays
There’s a different process for setting up each one, and we’ll cover all of them here. Let’s jump right in and add your first animated overlays to OBS.
How To Add Animated Overlays To OBS

Animated stream overlays are the most professional and commonly used amongst streamers. Adding overlays to OBS can be achieved using a media source. These media sources support both video and audio file formats. As you can guess animated overlays come in video file formats.
OBS maintains a list of all the media source supported file types so make sure you get overlays in a supported format. WebM is the most commonly used file type for animated overlays because; their file sizes are small, they include transparency values and don’t use a lot of CPU.
Let’s take a look at how to add an animated overlay to OBS with the steps below.
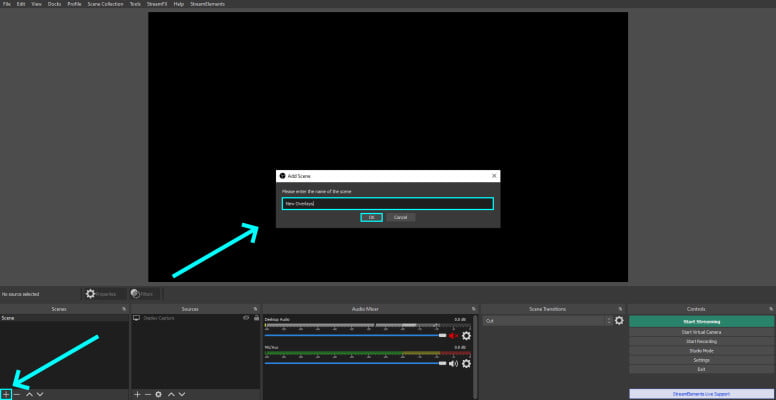
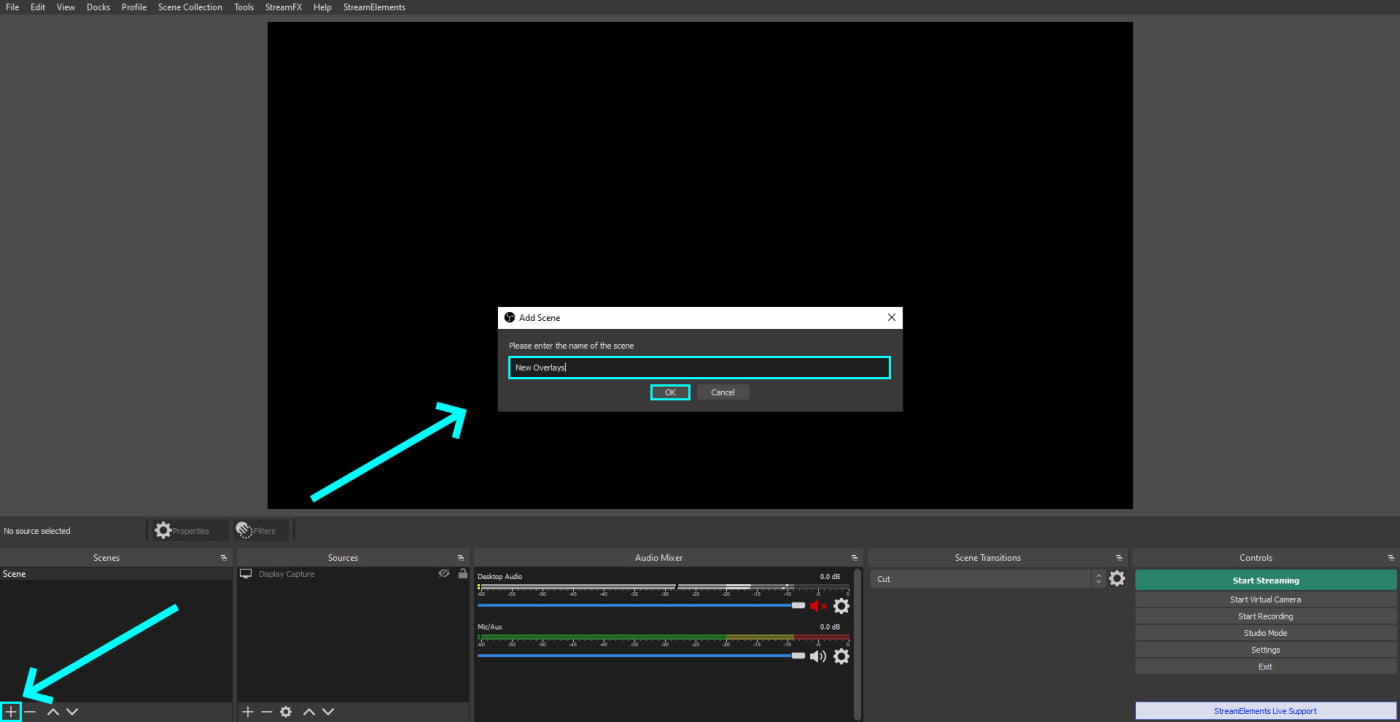
Launch OBS. Create a new scene with the + button. Or activate an existing scene by clicking it. Give it a name for and hit OK.

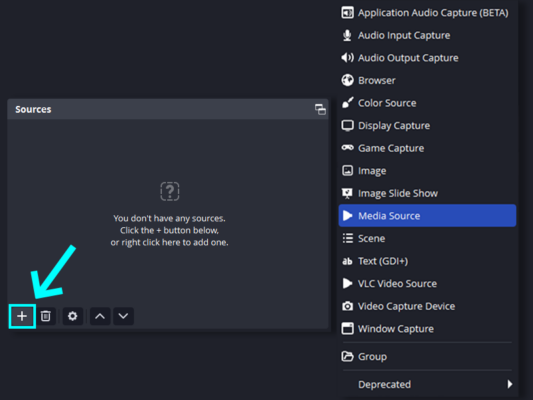
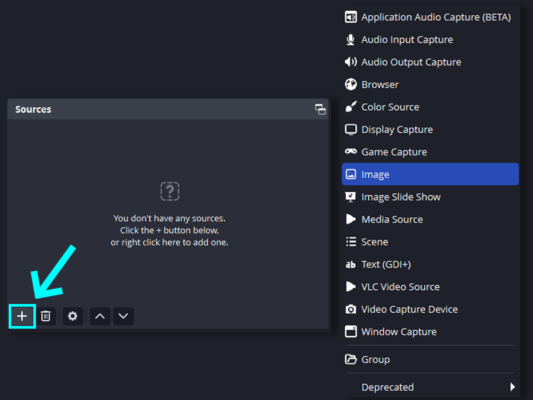
Create a new media source using the + Icon within the sources section. Choose a media source from the list.
You can also create a media source in OBS by right clicking in the Sources section and clicking, Add -> Media Source.
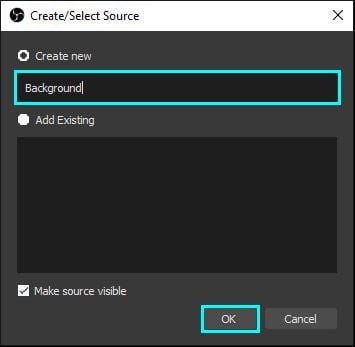
Click Create New, enter a name and press OK.
* Scenes can quickly become complex. Name the sources logically to maintain organization.

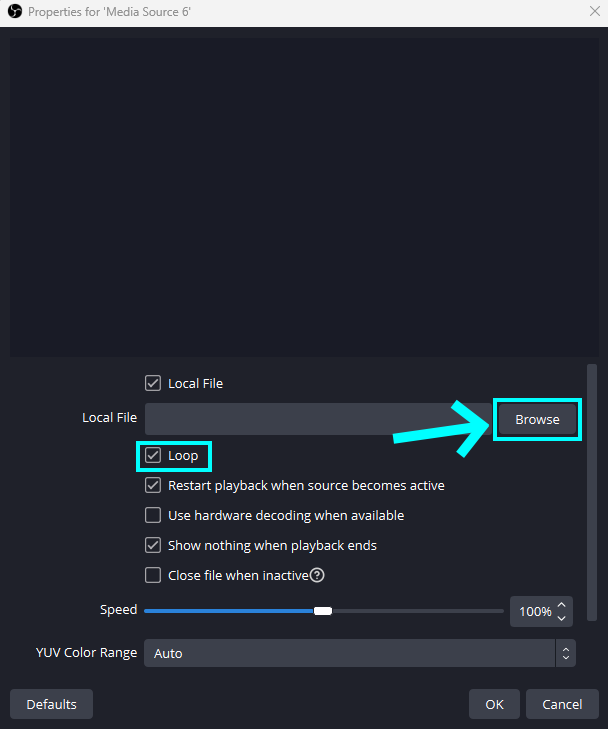
Click Browse from the properties dialog and choose your animated overlay file. WebM is the best format for animated files in OBS. Enable the Loop to make sure the animation loops indefinitely.
If you don’t see a browse button in the properties window, confirm that Local File checkbox is enabled.

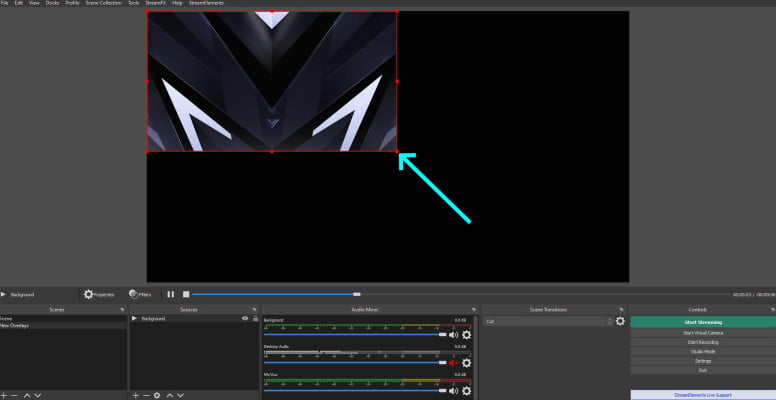
To resize a source quickly, right click it in the preview window and select Transform -> Fit To Screen. You can resize manually, by dragging left click on the corners. You’ll notice that OBS maintains the aspect ratio of the overlay when you resize.
Hold Shift + Left Click when resizing if you don’t want to lock the aspect ratio.
Holding Alt + Left Click whilst dragging the corners will crop the overlay source.

How To Add Image Overlays To OBS

There are some cases where animated overlays would be overkill and in those cases it’s much better to use a static image overlay instead. Adding an image overlay to OBS will require the use of an image source.
OBS maintains a list of all the image source supported file types so make sure you get overlays in a supported format.
Let’s take a look at how to add an image overlay to OBS with the steps below.
Add a new source using the + button in the Sources section. Choose Image from the list.

Name the source and press OK.

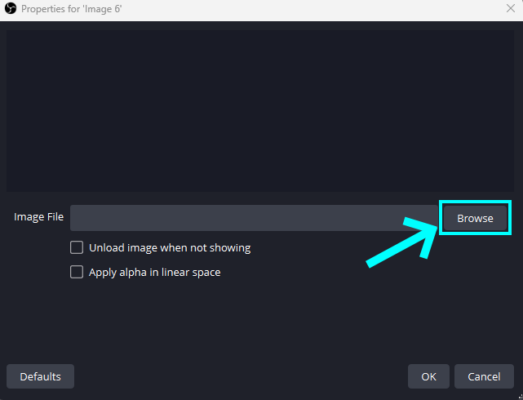
Click Browse and select your static image overlay. Click Ok.

- If the image needs resizing you can follow the same process as animated overlays.
How To Add Streamelements Overlay To OBS

Setting up overlays in Streamelements with OBS requires the use of a browser source. Streamelements stores your overlays online in the cloud. Integrating them with OBS can be a bit confusing without some guidance. Don’t worry, we’ve simplified the process with these easy to follow steps.
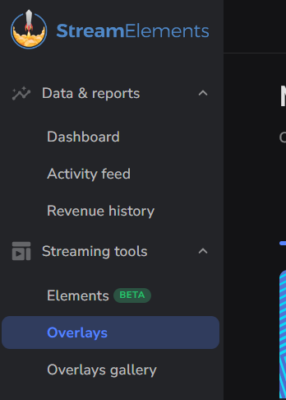
Head over to your Streamelements dashboard. Expand the sidebar on the left, then expand Streaming Tools -> Overlays.

Select the New Overlay button. This opens the overlay editor in a new tab.
Set resolution to 1080p from the dropdown and click Start.
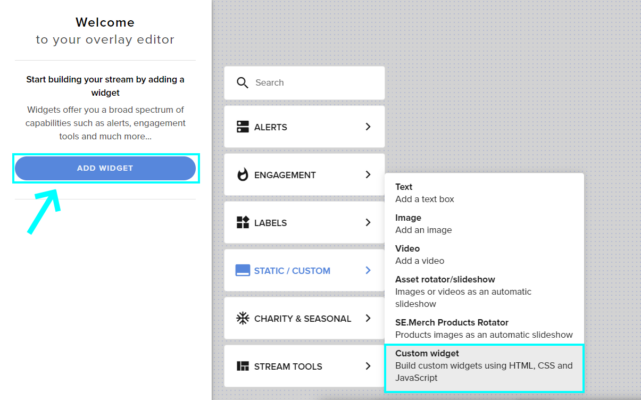
Select Add Widget -> Static/Custom -> Video. This adds a new video element to the canvas.

Click the newly added layer, and select Change Video.
Click Upload -> Select Files in the top right of the dialog. Choose the animated overlay file. Once uploaded, find the file and press Submit.
Enable Scaled To Fit and the Loop setting. Expand the Position, size and style section.
Set Width 1920 and Height 1080 and Center Widget. This makes the video overlay fit the whole canvas.
Finish off by clicking Save
Copy Overlay URL using the link in the top bar.
Launch OBS studio and create a new scene with + icon in Scenes section. Name the scene and press OK

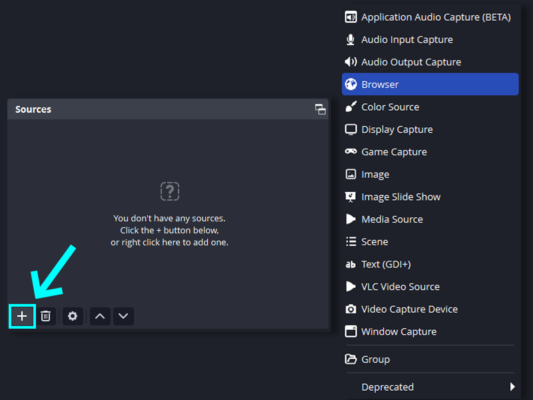
Press the + button within the scenes section and choose Browser Source from the list.

Name the new source and press OK.

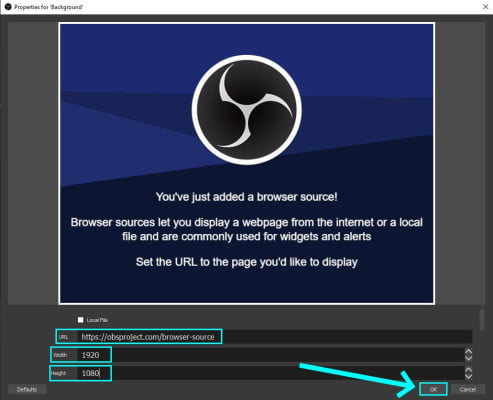
Paste the URL we copied in step 10 into the URL section of properties dialog. Set Width 1920 and Height 1080. Press Ok to add Streamelements overlay to OBS.

How To Add a Text Layer to OBS ?

The text layers in OBS are the perfect way to display important information to your viewers. Some of the use cases include displaying; top gifted subs, social handles, or even leaderboards.
Setting up a text layer is really straightforward if you follow our steps below.
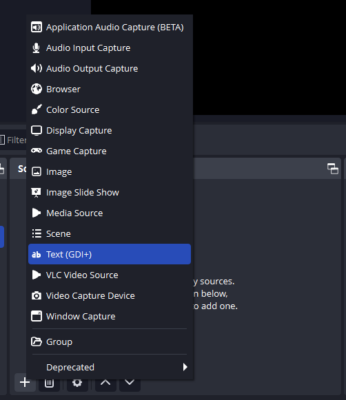
- Launch OBS studio. Select the + button from the sources section. Choose Text(GDI+) from the list of options. Name it and hit OK

- Select Pick a font and choose a font that’s consistent with your brand
- Enter text into the text field, or alternatively you can use text from a .txt file. The latter option is a great feature, especially when used for leaderboards or top donator rolling lists.
- Enable Anti Aliasing for even smoother edges. This can cost a little performance so be wary.
Where To Get Overlays for OBS ?
In order to add your overlays to add your first need to find overlays that are compatible. Luckily there’s no shortage of options out there. You have a few choices when it comes to getting these overlays. Check out your options below
- Make a stream overlay from scratch (Free)
- Use premium stream overlay packages ($)
- Freebie overlays (Free)
- Commission a professional artist ($$$)
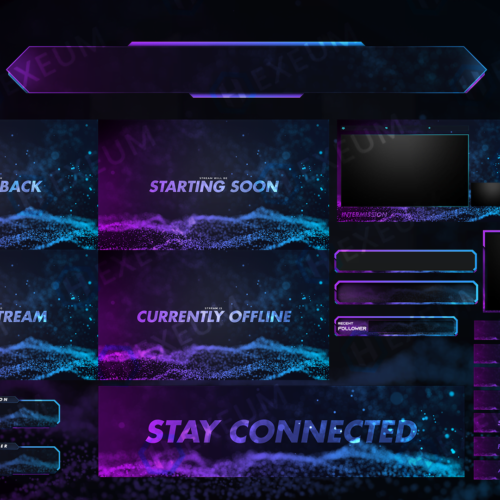
We recommend choosing overlays that are animated to give you a professional edge. Using animated overlays are one of the factors to consider when growing a Twitch stream. Since 2017 we’ve worked closely with streamers to give them a professional look. As such our overlays have been rigorously battle tested with all of the top broadcasting software including OBS to ensure compatibility.
Conclusion
By now you should understand the different ways of adding an overlay to OBS. Each option utilizes different features within OBS. However as you’ve seen most of the action happens within the sources section. So feel free to play around with different settings in there, you may just find a new feature for your stream !
If you haven’t already added overlays to OBS you’re missing out on a huge opportunity to maximize your streams potential. Hopefully this article has also shown you the flexibility that OBS gives you to craft your own unique stream layout. In addition to this, once you’ve got up to speed with the basics of the software, you’ll find that it’s incredibly easy-to-use and intuitive.
