thumbnail with the text add vlc playlist to obs

How To Add VLC Playlist To OBS

Playing a VLC playlist in OBS is an optimal method for establishing “always live” streams or for organizing a range of pre-recorded content such as a music to play during broadcasts. This guide will begin with a clear tutorial on configuring your VLC playlist to play in OBS. Afterward, we’ll address common setup challenges and their remedies. Whether you’re unfamiliar with VLC or seeking solutions to particular problems, rest assured: we’ve rigorously tested the VLC source within OBS to offer you the most reliable insights.

How To Play A VLC Playlist in OBS

Whethere you’re looking to add a music playlist or video playlist within OBS the most efficient way of doing this is via the VLC source in OBS. The following steps will guide you through this process.

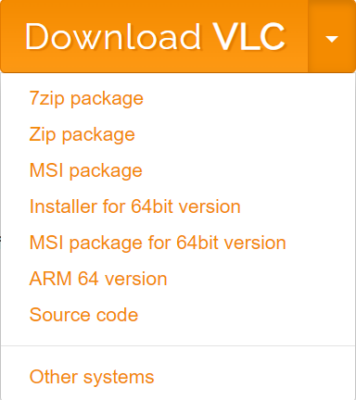
    1. Download and install VLC.
    2. If OBS was open during the VLC installation, restart it.

      creating a vlc source in OBS
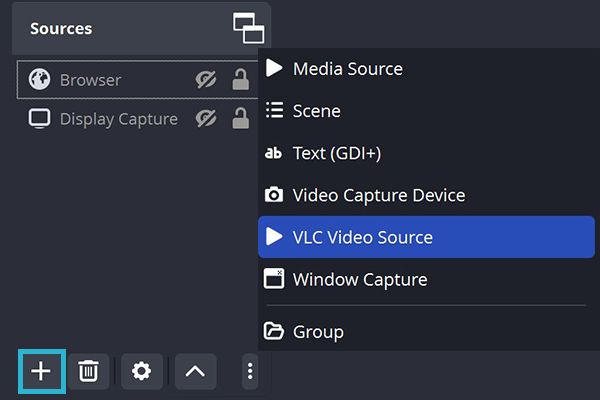
    3. Create a new VLC Video Source.
    4. Name the source and proceed.
    5. In the properties window, you have two options:
      • Add media files directly to create a playlist within OBS.
      • Simply add a VLC playlist from the source. This is recommended if you want to manage multiple playlists more efficiently.

vlc source properties

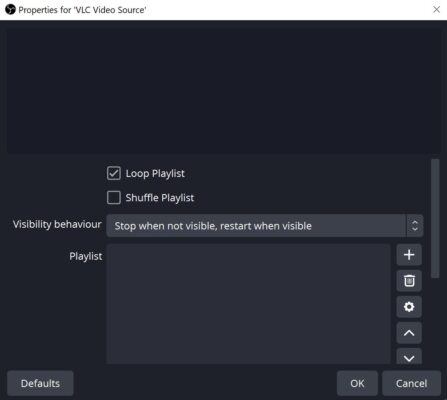
Click ‘Ok’. With the source enabled, your playlist will start playing.

VLC Source Not Showing In OBS Studio

When setting up a VLC playlist in OBS, it’s common to find that there’s no VLC source available to add. This often arises when OBS can’t locate your VLC installation. Follow these steps to identify and resolve the issue:

    1. Check OBS Logs for Errors: 
      • Navigate to Help -> Log Files -> Show Log Files.
      • This action will display a folder with your logs. Open the most recent log file.
      • Use the Find function (Ctrl + F) and search for “VLC”. If there’s an issue, you’ll likely spot an error related to VLC.

        obs log errors
    2. Troubleshooting Steps:
      • Update both OBS and VLC to their latest versions.
      • Ensure your VLC’s architecture (64 bit or 32 bit) matches that of OBS:
        • In OBS, go to Help -> About to determine its architecture.
        • Download the corresponding version of VLC, ensuring you select the right bit version from the download options.

          vlc download options
      • Verify that VLC is installed in its default location. If in doubt:
      • Uninstall VLC and then reinstall it, adhering to the default settings.
      • During reinstallation, ensure all VLC components are selected and installed.

These steps should help in resolving the VLC source issue in OBS.

No Audio From VLC Source

If you notice the VLC Video source audio is active in the mixer but not audible in the stream, it’s likely muted. To fix:

    1. Click the three dots next to the VLC Video source.

      obs audio mixer for vlc source
    2. Choose “Advanced Audio Properties.”
    3. Set the “Audio Monitoring” for the VLC Source to “Monitor Off.”

      audio advanced properties window in OBS

Audio Cuts Off Before Switching To New Video

A prevalent issue that remains unresolved involves the audio cutting off 3 seconds before a video concludes and transitions to the next. Despite being documented for several years, a solution has not been identified.

Conclusion

Utilizing a VLC playlist in OBS is a powerful tool for streamers, but like all technical endeavors, it can come with challenges, such as the no audio issue. This article has provided clear steps for setup and solutions to the most common problems streamers face using the VLC source. With these solutions you should be up and running smoothly, playing playlists to your heart’s content.

This entry was posted in .

Picture of Liam Doherty

Liam Doherty

Liam Doherty comes from game development background, initially exposing him to the world of content creators. In 2017 he decided to dive headfirst into the creators realm, offering solutions for branding and creating better content.

Related Posts

PREMIUM OVERLAYS