
Becoming a successful live streamer on Twitch is no easy feat, simply because of the sheer amount of broadcasters live at any given time on the platform. There are tens of thousands of streamers that are live on a consistent basis, with each one vying for the attention of Twitch’s many users. With so much competition, you’ll need to go the extra mile in order to catch the eye of new viewers. And one of the best ways to do so is by customizing your Twitch channel.
Why should I customize my Twitch channel?
Channel customization is integral for finding new users, as a Twitch channel theme will be the first thing a new viewer will see – and as we know, first impressions mean everything. The theme of your Twitch channel will showcase your personality, the overall vibe of your channel, and what sort of content new viewers might expect.
Plain channels without any interesting theme will feel generic to many users, and can potentially drive away new viewers. Customizing your Twitch channel is essential, as it is what allows your channel to differentiate itself from other live channels and can make you stand out from others.
What can be customized on your Twitch channel?
There are many different aspects of your Twitch channel that can be customized, including your profile picture, bio, stream schedule, banner, offline screen, channel emotes, and so much more. Further down we’ll show you step by step how to add or update each one of these channel customisation features. Make sure all of your graphical elements are using the correct sizes for Twitch.
Here’s a breakdown of all the different Twitch channel elements you can customize, and brief descriptions of them.
1. Profile Picture
Like all social media platforms, Twitch features the ability to customize your profile picture. Profile pictures are arguably the first thing that most users will see when viewing your profile or channel, as profile pictures will appear both on your channel page as well as whenever you chat in another Twitch channel’s stream. Because of this, it’s important to have a profile picture that properly fits your channel’s personality.
2. Twitch Header Banner
The Twitch Header Banner is the large background image that appears at the top of your Twitch channel. It’s important for you to have a header banner that properly captures your channel’s vibe, as it is very large and is the main background image for your channel. Both the header banner and profile picture are the first two things that new users will see when viewing your channel, so make sure you pick an image that fits your channel’s personality.
3. Offline Screen (Video Player Banner)
Anybody who views your Twitch channel while you’re offline is going to see your offline screen – therefore, having a customized offline screen is important if you want to have a consistent appearance for your channel. Just like all other elements of your channel, you should make sure that your offline screen properly captures the right vibe for your channel and feels coherent with the rest of your Twitch channel.
4. Social Links
This one’s pretty self-explanatory. If you have social media accounts connected to your Twitch channel, then you can link them to your channel here. They will appear alongside your channel bio, for easier access for your followers.
5. Bio
Within the About section of your Twitch channel, you add a brief description of you and your channel – while many Twitch streamers leave this section empty, it’s recommended to at least have a sentence. Twitch bios have a 300-character limit, so this section is less an about me section (save that for the Twitch Panels) and more used to show a bit of your personality.
6. Twitch Panels
Channel page panels are essentially the graphics that appear below a live stream video on one’s Twitch channel page. Twitch panels are used to organize your user profile, with common panel labels being About me, My Setup, Donate, and links to social media such as a Discord label. Twitch panels can be completely customized, and should have the same visual look as the rest of your Twitch channel in order to have a consistent appearance. Getting custom panels made is now easier than ever with our free Twitch panel maker.
7. Stream Schedule
One great feature that Twitch offers is the ability to add a stream schedule. Stream schedules allow channels to mark precisely when they will be streaming next, and even specify what game they’ll be playing. This is awesome as it allows your channel’s followers make plans to watch your streams and know ahead of time when to tune in. Creating a stream schedule can greatly improve your channel view count over time, so using it regularly is strongly recommended.
8. Twitch Emotes
Emotes are essentially emojis that are used exclusively within Twitch live stream chats. What makes Twitch Emotes special is how Twitch channels can create their own unique emotes, by uploading their own images! Having custom Emotes for your channel is not only an awesome way for users to interact on your channel, but also serves as a great reward for channel subscribers.
Twitch emotes needs to be in the optimal format for the best chance of getting approved. This can easily be done using a Twitch emote resizer tool.
9. Twitch Channel Points
Twitch channel points are reward points that viewers receive by simply watching a channel live stream. Channel points are rewarded for the more time users spend watching a channel broadcast, and can then be spent on Twitch channel rewards. But if you want to further add to your channel’s tone, you can customize your channel points. Both the name of your points and the icon image of your points can be customized!
10. Sub Badges
Subscribing to a Twitch channel grants users a handful of different rewards, access to exclusive channel emotes, ad-free viewing, and a subscriber badge. Sub badges are icons that appear next to usernames in a channel’s chatbox, which can be seen by other viewers. Sub badges show how long a user has been subscribing to a channel, as there are various tiers of sub badges (1 month, 3 months, 6 months, 1 year). You can customize Sub badges to fit more with your channel’s theme, and make each badge distinct from one another.
To avoid any issues when it comes to uploading your sub badges, make sure to use this badge resizer for Twitch.
How to change your profile picture on Twitch
First, let’s go over how to change a profile picture on Twitch. This is a super quick and simple process, with only a few steps involved. Here’s what you’ll need to do:
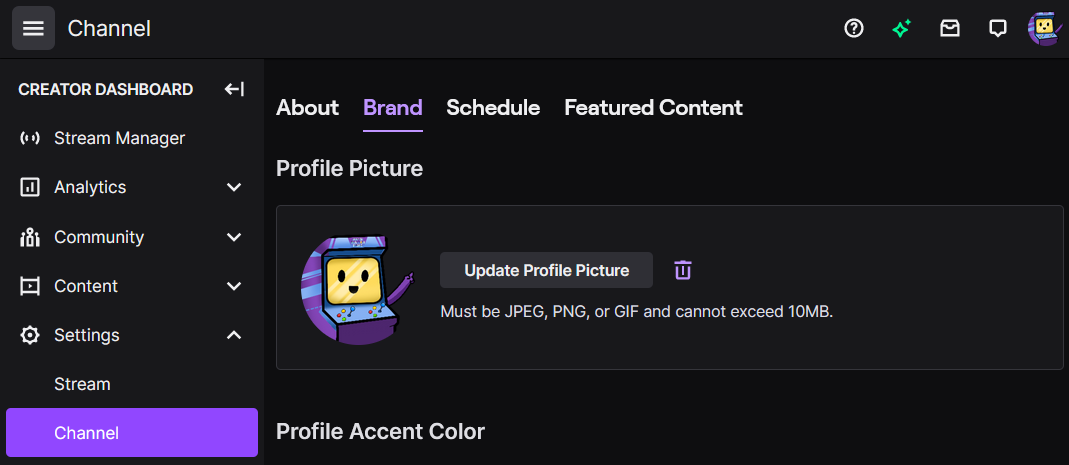
- First, log into Twitch and click on your profile icon in the top right corner of the screen. Select “Creator Dashboard.”
- Click on “Settings” and then “Channel” on the side menu. Select the tab labeled “Brand.”
- Under the “Profile Picture” section, click on “Update Profile Picture.”
- Upload your new profile picture from your PC. Keep in mind that your image must be in JPEG, PNG, or GIF format and must be smaller than 10MB.
How to add panels on Twitch
The process of adding panels to your Twitch channel is different from the rest, as it isn’t done through the Creator Dashboard. Here’s how to add panels on Twitch:
- Log into Twitch and click on your profile icon in the top right corner. Select channel.
- Click on your About and then underneath your About section there is a small option that says Edit Panels. select that.
- Click on the giant plus button. This will allow you to now create a new panel.

- Here, enter your Panel Title, the link that you’d like the panel to link to (if any), and the description. Upload an image. The preferred size is 320×100 pixels. Keep in mind that if you’re uploading a panel image, then you don’t need to enter a title.
- Click Submit. Take a look at your panel, and make any adjustments as needed.

How to change your Twitch banner
Changing your Twitch header banner is also a fairly straightforward process, and only takes a couple of steps. Here’s how:
- Log into Twitch and click on your profile icon in the top right corner of the screen. Select Creator Dashboard.
- Click on Settings and then Channel on the side menu. Select the tab labeled Brand.
- Under the Profile Banner section, click update. You’ll be asked to upload an image for your banner.
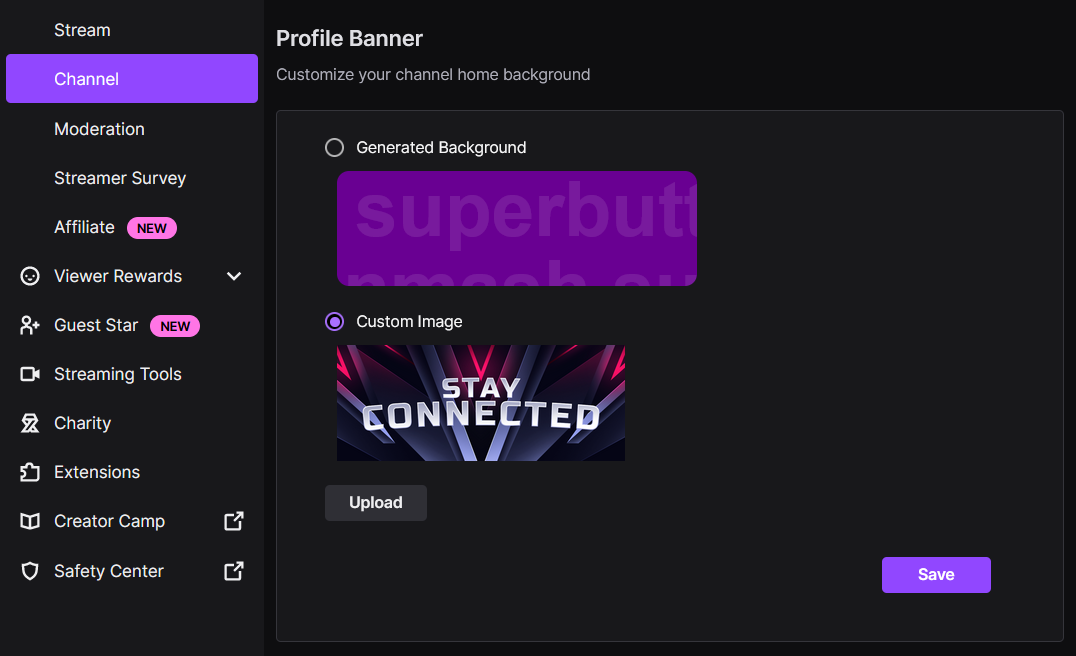
It’s worth noting that the recommended size for a profile banner is 1200×480. Use the Twitch banner resizer to get the perfect dimensions.
Twitch pages will automatically scale based on the width of one’s browser window. Any images that are shorter or taller than 480px will be scaled to 480px, and images that aren’t wide enough will get stretched if one’s browser window is wider than the image’s width.
In order to ensure the same consistent look across all devices, you should keep your image at the recommended image size.
How to change your offline screen on Twitch
Next, let’s go over the process of changing your offline screen, or your video player banner. Here’s how to do so:
- Log into Twitch and click on your profile icon in the top right corner of the screen. Select Creator Dashboard.
- Click on Settings and then Channel on the side menu. Select the tab labeled Brand.
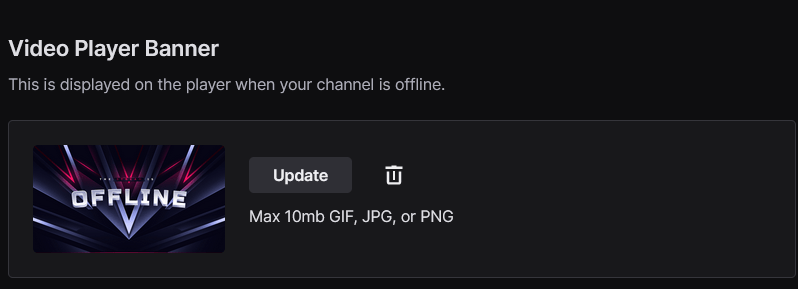
- Scroll all the way down to the section entitled Video Player Banner. Click on the Update button.
- Upload an image from your computer. The image must be smaller than 10MB and be a GIF, JPG, or PNG file. The recommended image size is 1920×1080.
How To Add Bio & Social Links
Next, let’s go over how to add social links to Twitch, as well as your bio info. This next step is very simple. Here’s what you need to do:
- Log into Twitch and click on your profile icon in the top right corner of the screen. Select Creator Dashboard.
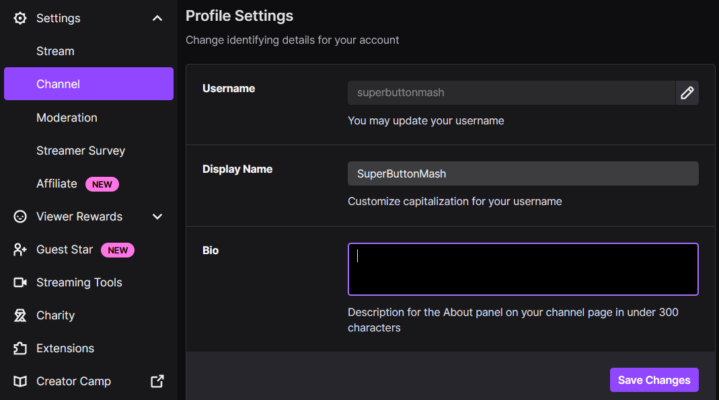
- Click on Settings and then Channel on the side menu. Select the tab labeled About.
- Go down to the Profile Settings section. The third section is labeled Bio. Change your bio to whatever you’d like. Keep in mind that you have a 300-character limit. Click save changes once you’re done.

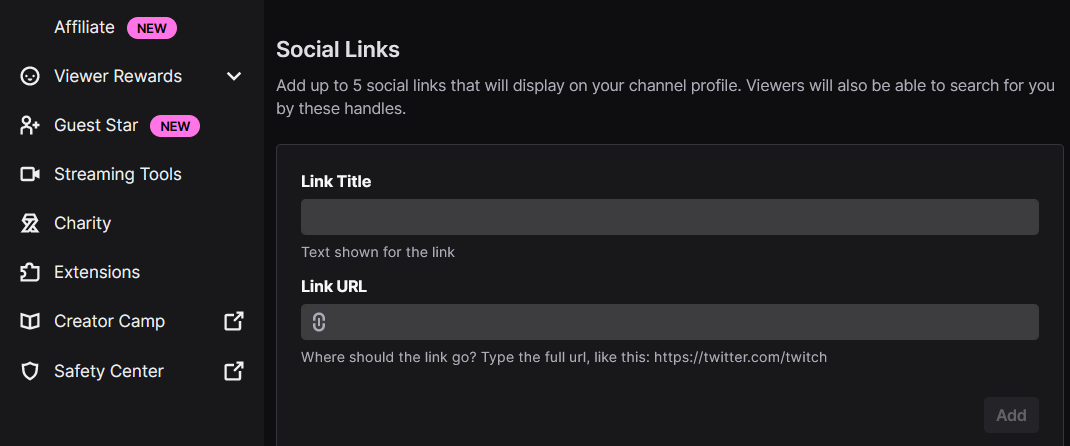
- Next, scroll down to the social links section. Here, you’ll be able to add any social media accounts to your profile.
- Enter the title of the link (what will appear on your profile) and the link URL. Click add. Now, your link will appear on your Twitch channel page. Scroll up to the top of the page to see your bio and profile preview. This is how it will appear on your channel page!
How To Add a Stream Schedule to your Channel
Much like other processes in this guide, the process of adding a stream schedule to your channel is super straightforward and can be accomplished through your Twitch account. Here’s what you’ll need to do:

- Log into Twitch and click on your profile icon in the top right corner of the screen. Select Creator Dashboard.
- Click on Settings and then Channel on the side menu. Select the tab labeled Schedule.
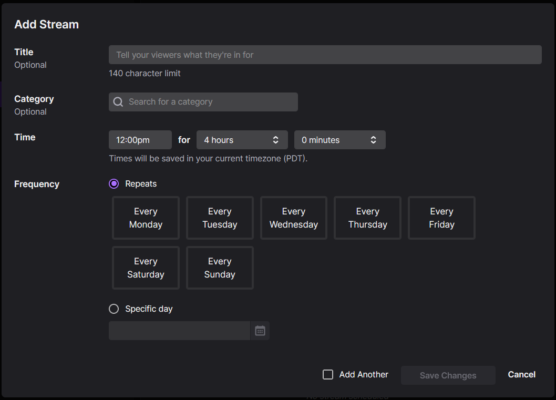
- Select Add Stream.
A new window will open. Here, you’ll enter all of your information for the stream, including the title of the stream, the category (game), the time, day, and length of the stream, and whether the stream is a one-time broadcast or a weekly recurring stream. At the very bottom, check the box labeled add another if you want to schedule another stream. Click save changes.

- And voila! Your Stream Schedule now appears in your Twitch channel page. You can easily delete schedules, add new streams, or switch to vacation mode (all streams will go on hold until you return from vacation). You can also export your calendar to Google Calendar for easier organization.
Customization Outside of the Channel Page
Of course, there are plenty of other customization options available for streamers outside of the Twitch website itself. If you want to know how to make your stream look better while broadcasting, adding customized stream themes, custom-made alerts, unique widgets, and other elements will help. Having a customized stream theme can really allow streams to feel more professional, attractive, and engaging for viewers.
Stream Overlay Packages
Arguably, one of the most important things that you should prioritize when customizing your Twitch channel is your streaming overlay. Streaming overlays allow your channel to appear more distinct and professional, and is a great opportunity for you to show off your vibe.
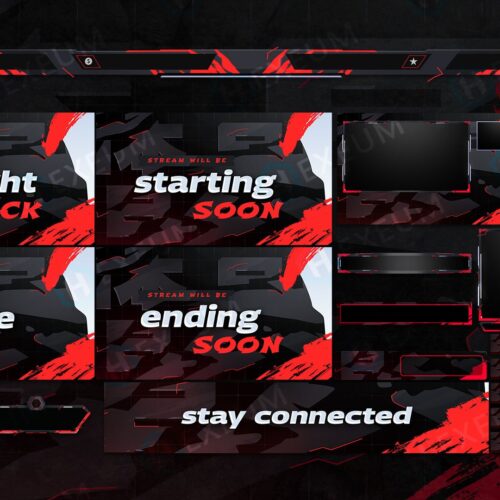
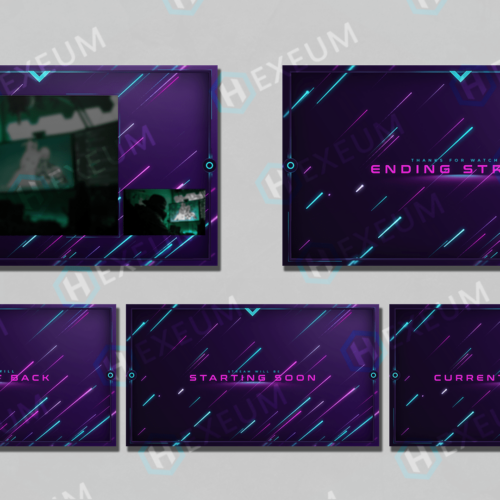
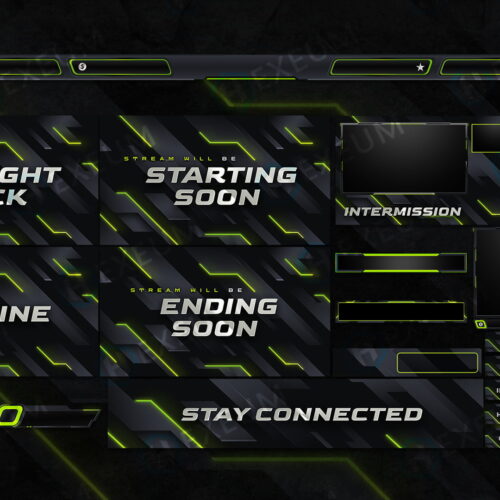
Facecam overlays are what will border your webcam’s video feed, so it’s important to pick a border that fits your personality. You should also make sure that you have a “Starting Soon” screen (a screen to display before you start your stream), a “Be Right Back” screen (during breaks), and a “Stream Ending” screen (to display at the very end of a stream).
The type of games you play may also be a deciding factor for what sort of streaming overlay you should use. If you mostly stream old-school Nintendo games, then maybe pick an overlay that’s a throwback to the NES or Super Nintendo. If you mostly play survival horror games, then try out a spooky overlay.
You can either make your own Twitch overlays, or get them premade. Hexeum features a huge variety of stream overlay packages available to download instantly. Consider checking out our store – there’s sure to be an overlay that fits you and your channel’s style!
After you find a streaming overlay that you like, you’ll need to add it to your streaming software. This process can be a bit confusing for newcomers, but if you want to learn more then you can take a look at Hexeum’s guide on how to add overlays to OBS.
Stream Widgets
Plain streams can often become boring to look at for viewers, so adding widgets to your stream can really help add a bit of additional personality. Stream widgets are used to visualize real-time data feeds from your stream layers, and display them on your stream attractively.
Common widgets used on streams are:
- Chat Box – Adds the Twitch chat directly to your video stream. This is a great widget to have if you plan on saving clips of your stream and want to keep your chat saved.
- Goals – If you’re trying to hit a specific Sub or donation goal, then you might want to add a goal widget to your stream. Streamers that have specific goals on their stream are more likely to reach them when their goals are present on their video feed.
- Event List – Events list things that have recently occurred on one’s broadcast. Events can range from sharing a user’s recent donation to sharing a recent Sub or follow.
If you want to add a bit of extra pizazz to your widgets on stream, then consider purchasing premium widget themes. Hexeum offers tons of high-quality widget packs in its store. If you’re interested in adding widgets to your broadcast, then take a look!
Twitch Alerts
Alerts appear during streams whenever certain events occur – the most common alerts appear when a viewer follows, subscribes, donates, sends bits, or raids while a stream is live. In order to engage more with viewers and celebrate these events when they occur, it’s a great idea to have Twitch alerts in place. Alerts should be short, clean-looking, and fit with the rest of your channel’s aesthetic.
Luckily, Hexeum offers professionally-made alerts for your stream, both individually and in streaming packages. If this sounds like something that your channel could benefit from, then feel free to check them out.
Twitch Extensions
One great way to increase engagement with your viewers is through the use of Twitch extensions. Extensions are third-party applications that sit inside Twitch and provide extra functionality during streams. Streamers can add extensions to their own channel in order to provide some additional functionality, with many extensions providing new ways for streamers to engage with their followers. Here are five of our favorite extensions:
- Stream Avatars – Stream Avatars is an application that adds pixel avatars for your followers onto your broadcast. This allows followers to feel more included in your broadcast by giving them a physical presence and even allowing them to choose any avatar of their choice. You can customize which avatars are available, with many community-created avatars such as Pokemon and Super Smash Bros avatars.
- Stream Stickers – Another fun one for increasing engagement, Stream Stickers allows viewers to pay bits to stick stickers onto your stream. Over 50 different stickers are available to be used, with loads of different customization options. This is a great one for engaging more with viewers while also earning some extra bits in the process.
- Sound Effects – Interested in finding new and creative ways to earn bits on stream, while also increasing engagement and randomness into your broadcast? Well, then Sound Effects may be the perfect extension for you! Sound Effects allows users to choose their favorite sound effects, and allow viewers to pay bits in order to play them on stream! Anything ranging from fart noises to screams is available, with lots of customization options.
- Crowd Control – One fun way to increase engagement on your channel is with the extension Crowd Control – this extension gives your viewers additional control over your stream, by allowing them to directly change different aspects of the game. Effects include temporarily changing the game speed, warping the player, giving or taking away items, and much more! Effects can also be locked behind channel points, which can give viewers a great incentive for watching your stream more!
Customizing Your Streaming Room
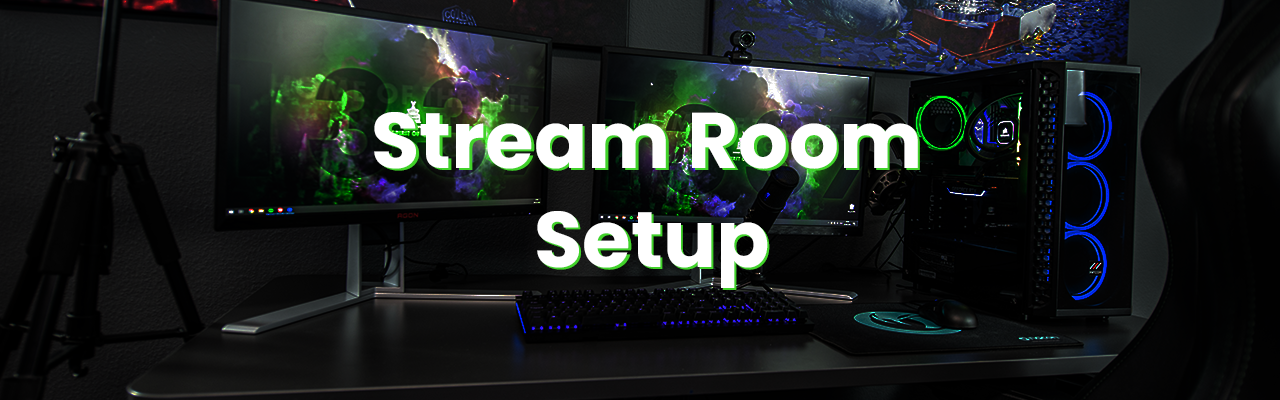
Lastly, don’t forget to customize your streaming room – by this, we mean the physical room that you use to stream your content. Just as a film set should be properly dressed and built, streamers should put in the extra work and customize their streaming rooms. This can simply mean putting a couple of posters of your favorite games on the wall behind you, as you don’t have to put too much time or money into the customization of your streaming room. This is also something that can slowly build and grow over time and doesn’t have to be anything too fancy.
To start, we recommend getting some decent lighting and a backdrop that looks pleasant (or at the very least, covers up your messy room). Hexeum has an entire guide for how to set up your streaming room. Check it out if you’d like more information.
Software For Customizing Your Twitch Stream
While they are optional and not necessary, there are also several other third-party applications that can allow users to customize their Twitch streams even further. With so many different options out there, it would be impossible to list all of them – so here are just some of the most popular software tools available for customizing Twitch streams.
Streamlabs
Streamlabs is truly an all-in-one application for live streaming. This broadcasting software comes in two different flavors: a free-to-use version, and Streamlabs Ultra which costs $19 per month or $149 annually. Ultra packs in tons of additional features, including tons of pre-made stream overlays, alerts, and more – however, users cannot use the overlays outside of Streamlabs, and lose access to them all if they ever unsubscribe.
Streamlabs also features an app store, which has tons of great apps that users can add to their stream to further boost engagement with viewers, including Hexeum’s own app streamer lower thirds.
While Streamlabs is more expensive than other options out there, it certainly features a lot of variety when it comes to streaming customization, all of which is wrapped up in a nice little package.
Stream Elements
For OBS Studio users, Stream Elements is an absolutely essential tool. For newbies, Stream Elements is a free-to-use cloud-based streaming application that hosts all of your overlay assets. While most commonly used alongside OBS, Stream Elements can also be used with other streaming software like Streamlabs and Xsplit. The tool is popular as it doesn’t take any additional processing power to use unlike Streamlabs’ tools, since it only uses a browser source on streaming software.
Stream Elements has thousands of free user-created templates and widgets, making it more affordable than options like Streamlabs and LightStream Studio. With so many different free widgets and templates available for it, there’s no wonder why Stream Elements is so popular.
Lightstream Studio
Lightstream Studio is a streaming application that allows users to broadcast themselves directly through a web browser, without the need for streaming software – this means there’s no need for OBS or Streamlabs! Additionally, the tool can connect with consoles over wifi, so expensive equipment like game capture cards aren’t required.
But another area that it shines in is its streaming overlays and stream themes. Users can choose from tons of streaming overlays included within LightStream Studio’s tool, with all overlays included with the subscription cost. One downside of this, however, is that users must continue paying for Lightstream’s subscription in order to use overlays, and users will lose access to them if they even unsubscribe from the service.
TriggerFyre
Quite possibly one of the most fun and hilarious third-party applications, TriggerFyre is a program that allows you to create media triggers that your chat can activate while broadcasting live on Twitch. This means that viewers have the ability to pay channel points to play silly sound effects, GIFs, and videos on stream. This can create some truly hilarious moments on stream, boost viewer engagement, and incentivize followers to rack up their channel points and therefore watch your stream more.
About Hexeum
We hope that this guide has been helpful to you! If you’re looking to customize your channel, then we suggest checking out Hexeum’s store. Hexeum’s website offers a large library of custom designs that can help elevate your live stream and really stand out from the crowd. And unlike overlays offered by LightStream and Streamlabs, you keep Hexeum’s overlays forever and can use them in any streaming software of your choosing. If you’re looking for ways to improve your channel, then look no further – visit Hexeum’s store today!