The process of starting off as a streamer is certainly no easy task — from buying all of the necessary equipment to becoming comfortable with broadcasting yourself to strangers on the internet, there’s no doubt that there is a learning curve when it comes to live streaming. But one aspect of streaming that stumps many of us less tech-savvy individuals is using streaming software – and learning how to get the most out of it.
OBS Studio, while one of the best and most powerful streaming software available, can be somewhat confusing to navigate. Without understanding how to properly use it, it can be hard to know the best OBS settings needed for streaming and recording content. But we’d like to help. After all, our goal here on Hexeum is to offer helpful advice that can lead to successful streams, and squeeze out as much quality out of one’s streaming software as possible.
So in order to provide our readers with the best information possible, we met with a real expert within the field, Boban Tasevski, who is the live events producer, utilizing OBS Studio on a daily basis. Sitting down with Tasevski, we discussed the technical aspects of OBS Studios, the software’s best use cases, and the best settings in order to get the very best results when streaming and recording. Let’s jump right into our interview with him.
Introduction
Hexeum: Can you please tell us your name, and how you work with livestreamers ?
Tasevski: My name is Boban Tasevski. I currently work as a Technical Director for Live Virtual Events and Webinars and have been doing so for five years now. The main software I utilize for performing live streams is my best friend, “Open Broadcast Software” (OBS).
In my role, I cooperate with streamers, gamers, online course creators, and coaches who need me to set up their OBS. I optimize their settings, set up designs, widgets, and alerts. I help people with any streaming platforms, such as Twitch, YouTube, LinkedIn, Trovo, TikTok, and Instagram.
I’ve directed Live Events for big companies such as Withlocals, REsimpli, CyberHeroes, TLIC Worldwide, Inc., PHILLIPS, etc. Also, I’ve worked with big streamers such as Baka Prase, Pomerzz, LEC, TFBlade, Nikolarn, and many others.
Hexeum: What are the different use cases for OBS Studio?
Tasevski: Open Broadcast Software, or OBS, is a software mainly used by streamers and gamers, but we won’t exclude the fact that many people who want to record courses, webinars, and some virtual events use OBS as their primary software.
Hexeum: Today, we wanted to go through the main differences between streaming and recording video content through OBS, and all the things you should know to either stream or record your content. Our goal is to give our readers tips so that they can get the most out of the software. But before getting into those details, can you tell us what the differences are between using OBS for recording versus streaming?
Tasevski: Yes. There are significant differences between streaming and recording through OBS, and it is essential to understand these differences in order to optimize the settings according to your specific needs. For example, to effectively stream your content to any streaming platform such as YouTube, Twitch, Trovo, Facebook, LinkedIn, TikTok, etc. you will be required to have a stable and high-speed internet connection. Now you might be asking yourself, “But, what is considered a high-speed internet connection and how can I check if my network speed is good enough to stream?”
Hexeum: Right, I’m sure that that’s a common question asked by many new streamers. What would be considered “high-speed internet?” What factors impact one’s stream quality, and are there other significant factors that affect a stream’s quality other than the speed of someone’s internet connection?
Best OBS Settings for Streaming
Tasevski: So exactly, that’s why we are here today – to go through the best OBS settings for recording and streaming and find an answer to those questions as there are tons of factors that can affect a stream’s performance, as the internet connection is not the only criterion you should worry about to have a smooth and stable high-quality stream.
Things such as latency, bitrate, resolution of the camera, the output (scaled) resolution, etc. all impact it. But all of these factors are connected, and the best way to know what works best for your setup is by constantly going live on a streaming platform.
Hexeum: And by that, you mean test streams?
Tasevski: Yes. I would suggest using YouTube as you can go live and you can set the settings to “Unlisted”, which means that nobody except you will be able to watch the stream, and after you have done the testing, you can simply delete that live stream from your channel.
Hexeum: So what is the recommended internet speed for streaming on platforms like Twitch and YouTube?
Tasevski: Well if we assume that your internet connection is anywhere between 100-150mbps Download Speed and 50-80mbps Upload Speed (which is the most common Internet Speed users have), you can assume that your internet speed is good enough to stream with 4000kbps-6500kbps, which can be considered a high-quality stream. But this doesn’t mean that you should immediately go to the “Output Tab ” in the Settings of OBS and change it to 6500Kbps without checking the resolution of your camera and the output scaled resolution.
Hexeum: Are there any other tips that you would suggest for getting the best possible quality possible when streaming using OBS?
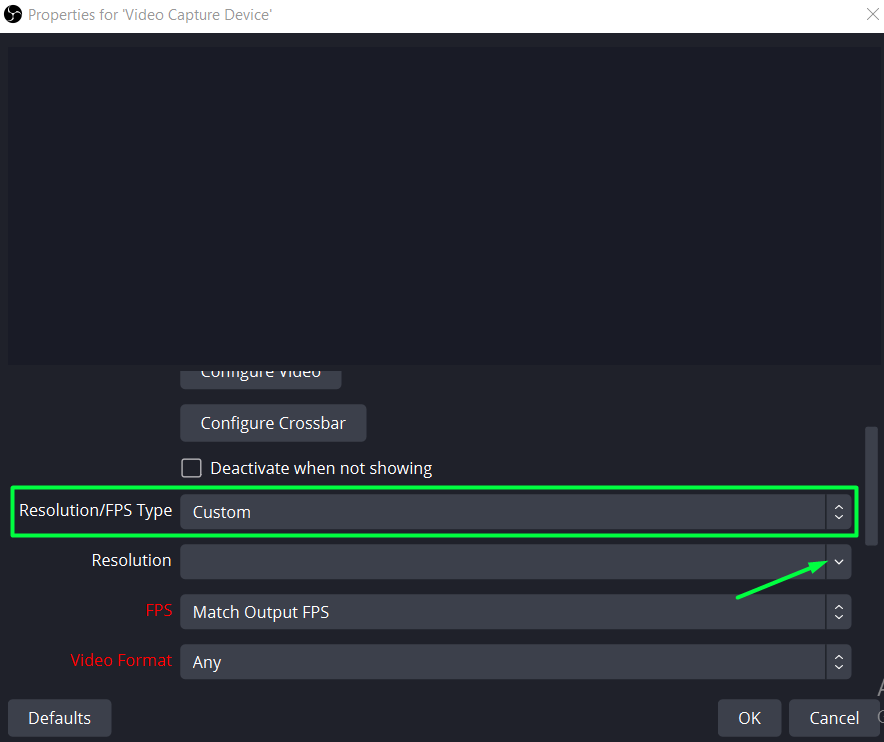
Tasevski: Yes. If you have an HD Camera (Sony, BlackMagic, Logitech, Mevo, etc), make sure to double-click on the source that’s usually called “Video Capture Device” and has a camera icon. By default, this source will be set to the wrong setting called “Device Default” and make sure to change it to “Custom”. Once you have done that, click on the little dropdown menu under “Resolution” and select the highest quality of the camera (1920×1080 or higher if the camera is 4k Resolution). After you have done that, click the “OK” button and you will immediately see the difference.
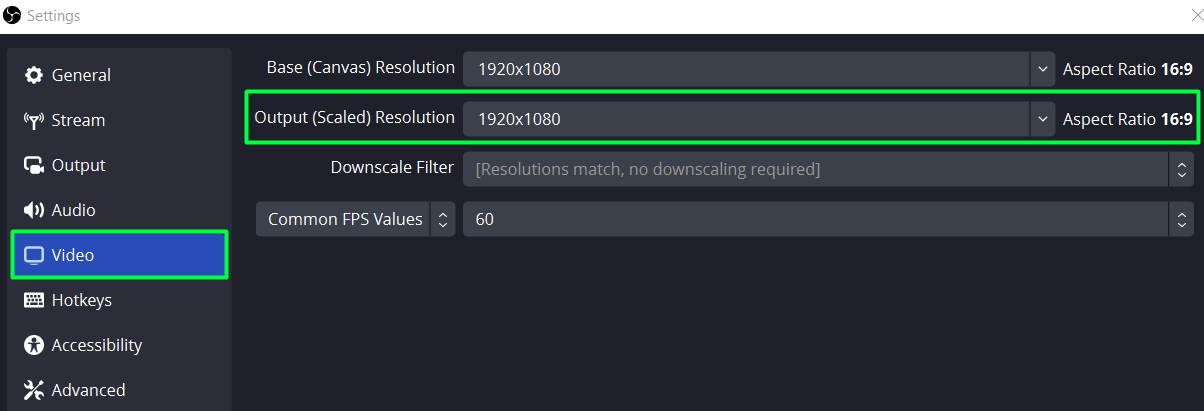
Ok now the camera is sorted, however, there are more steps involved in getting the highest quality possible. One of the following two steps should help you out massively. Go to the bottom right corner of OBS and click on “Settings”. When the new window pops out, click on the tab saying “Video”, now set the “Output (Scaled) Resolution” to 1920×1080 (Depending on what resolution your monitor is, but set it to the highest resolution possible), also set the FPS to 60 or 59.94.
In the second step, while you are in the Settings section, click on “Output”, and set the output mode to “Advanced”. After that, make sure that you change the OBS bitrate to 4000Kbps. By default it might be set to 2500Kbps which is pretty low, and the “Rate Control” to “CBR”.
After this step, you can connect your YouTube/Twitch Channel to OBS by going to the “Stream” section in settings and creating a new Live Event by adding the Server and Stream Key. Logically, if the stream is smooth and there is no lagging or buffering, you can increase it slowly, increasing in +300Kbps increments. Continue testing and stop when you are happy with the result.
Best OBS Settings for Recording
Hexeum: So those are the best settings that you’d recommend for streaming. But how about recording with OBS? What are the biggest factors that you need to consider when recording with OBS?
Tasevski: So, recording with OBS is a much easier-to-understand process, because when you record, you can be offline, you don’t even need to be connected to the internet. Because of this, there’s no need to worry about things like bitrate adjustments. But what I previously mentioned regarding having to increase the resolution of the camera and also the output scaled resolution applies here.
Additionally, having a good CPU (Central Processing Unit) is crucial while recording as OBS heavily relies on it for both streaming and recording. It’s essential to ensure that your computer or laptop meets the minimum requirements for CPU and GPU specifications to produce normal or high-quality content, regardless of whether you’re streaming or recording. It’s also worth noting that while recording you can edit the footage later to add effects, adjust colors, or cut out unwanted sections. This provides flexibility in the post-production phase, which is not always possible while streaming. Therefore, recording content using OBS can be a great option for those looking to produce pre-recorded videos for platforms such as YouTube, LinkedIn, Vimeo, etc.
Hexeum: What are the specific minimum requirements for recording video on OBS?
Tasevski: So the minimum CPU requirements for high-quality content, according to OBS, is either an AMD Ryzen 7 58000H or a CPU comparable to the Intel Core i7-11800H. Some older CPUs may still work, but OBS can’t guarantee that your video content will be smooth and lag-free if you have set the resolutions to the highest possible.
The minimum GPU required for high-quality content is the Nvidia GeForce 3050 or the MX450 should work fine as well, but any other GPU that has lower quality than these two GPUs may not be good enough for streaming or recording.
We recommend at least 16GB of memory or if you can afford 32GB, that would be really good for streaming and recording.
These are a few metrics that you should compare your PC/Laptop with, so you can have some vision of what’s a good setup to achieve your goal.
Recommended Tips & Tricks
Hexeum: What are some tips and tricks that you would recommend to new streamers who are attempting to gain new viewers for their streams?
Tasevski: I recommend checking out Restream.io, which is an online software that is free to use. It allows you to stream on multiple platforms at the same time. Just know that for this you must have a really good PC/Laptop and a high-speed internet connection (150mbps Download and 150mbps Upload Speed). Let me walk you through how to connect this platform to OBS and then we will talk about the good things about Restream.io and how it can help the streamer.
Once you log in to their website, you will see their homepage and click on the button where it says “Set up for OBS, Zoom, etc.”

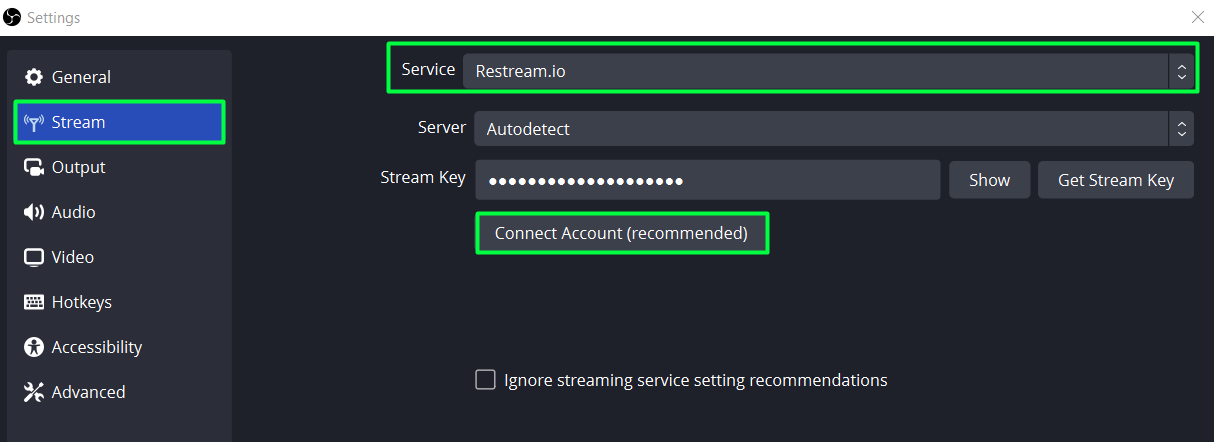
Once you click there, you will be provided with an RTMP URL and a unique Stream Key. But, you can simply connect to your account through OBS, by clicking on the “Settings” Button in OBS, and then navigating to the tab called “Stream”. Once you have opened that tab, in the “Service” section select Restream.io and click on the button saying “Connect Account (Recommended)”.
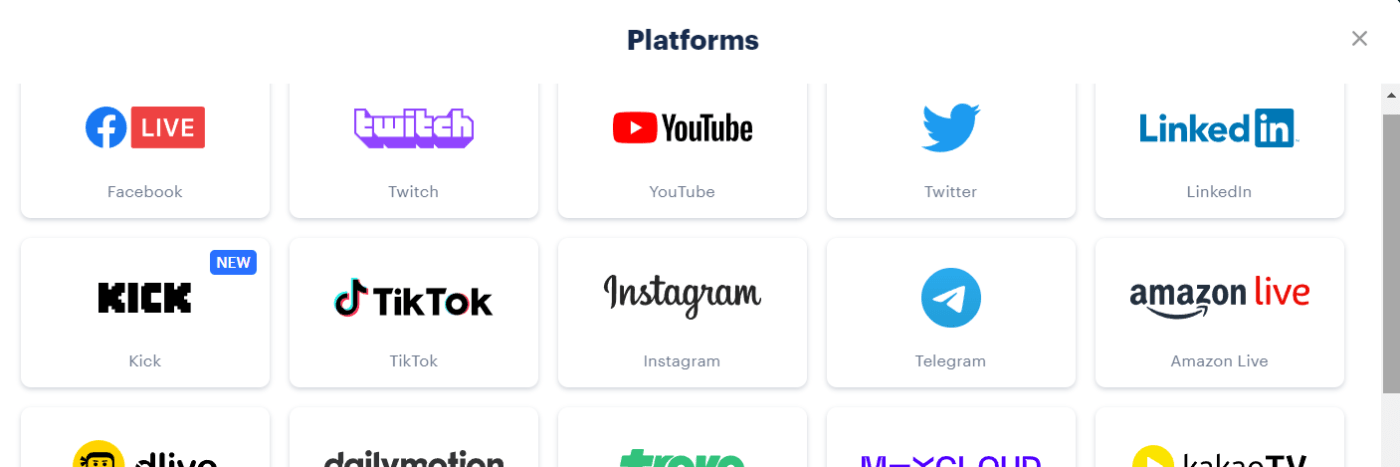
After successfully connecting OBS and Restream.io, go to Restream’s site and click on “Add First Channel” and you can connect your YouTube, Facebook, LinkedIn, Instagram, TikTok, etc. Just know that with the basic and free plan, you can stream only to two platforms at the same time, and I would recommend YouTube always being one of the two options.
Hexeum: Why do you recommend YouTube over other platforms?
Tasevski: Out of all of these platforms, YouTube is one of the biggest if not the biggest platform. However, it’s not just about choosing the biggest platform. The thing is that YouTube is the only platform that has algorithms, and that means, by being active and streaming on YouTube, random people can come across your stream. This means that you will have free traffic coming to your live stream. This is largely due to the fact that, when you start a stream on YouTube you can add description, title, and keywords. The YouTube algorithm will then work its magic, potentially exposing your stream to people who are interested in the topics or games you play. For example, if you stream a game like League of Legends and add it in the title, description, and keywords, your stream will be shown to people who watch League of Legends videos on YouTube, and those people may be potential constant viewers in the future!
This is one trick that I am sure works really well, as on Twitch it is hard to have random people joining your stream as a solid algorithm doesn’t even exist on that platform.
Hexeum: Is there another tool that you would recommend? Particularly one that would help those who plan to primarily use OBS for recording purposes?
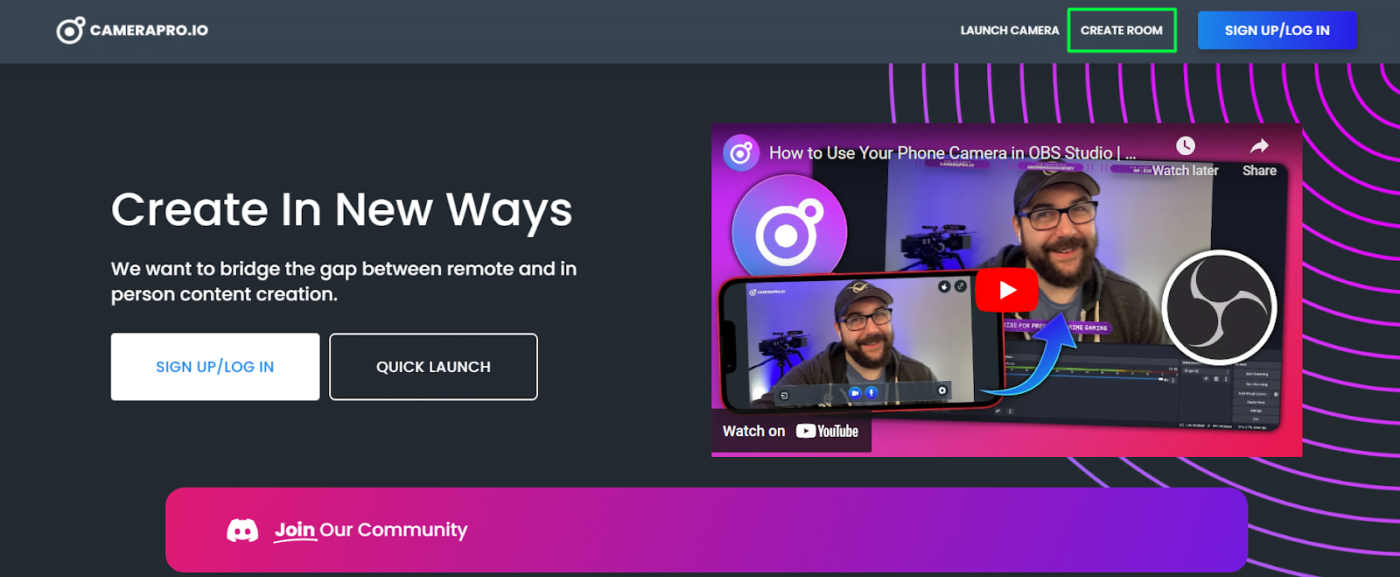
Tasevski: For those who want to record educational videos or collaborative streams with more than one person’s camera on the screen, OBS itself doesn’t provide you with an option where you can just click a button and add a guest. That’s why it is important to know how to add someone to OBS through the online software called “CameraPro.io”
Once you get on their website, make sure to click on the button where it says “Create Room” and it will make a room with a uniquely generated URL link that you can share with the person/people that you want to join to OBS.
The participants will be asked to write their names and enable their camera and microphone, but the creator (You), will be asked to write your name and name the room!
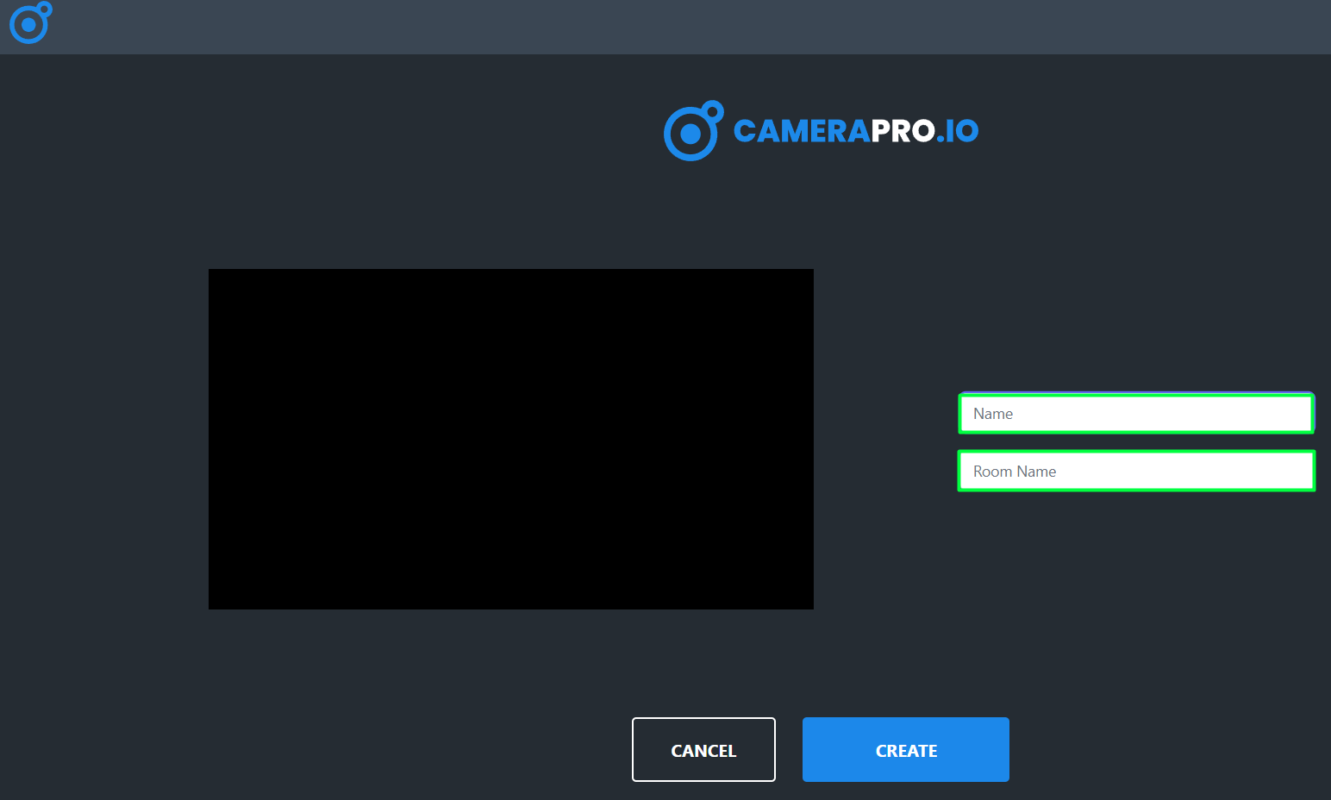
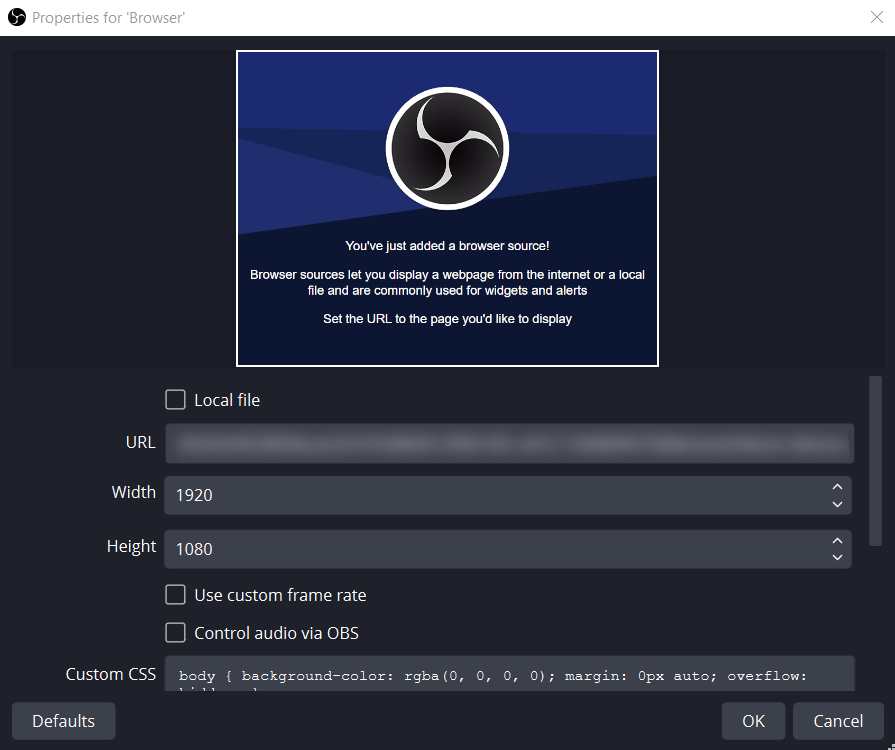
Once you get in the room and you share the URL link with the guest, they will join in the room and all you have to do is click on the little icon on the top right corner of their camera and it will copy a link to the clipboard. Once you have done that, head to OBS, and add a new source called “Browser.” When the window for a new browser opens, create a new browser, name it, and then insert the link that you copied in the field URL, set the Width to 1920 and Height to 1080, and click ok.
Guest’s camera will appear on the canvas in OBS and you will be able to place their camera wherever you want to position it.
This is one of the things that a large majority of people don’t know, and it can make the stream or recording super interactive and fun to watch!
Hexeum: Thanks for sharing that! I wasn’t even aware of that software tool before. I’m sure lots of streamers reading this will find some value in these tools, and the tips that you shared today. Thanks again for talking with me and sharing some of your knowledge.
Tasevski: Of course, it’s been a pleasure chatting.
Stream with OBS
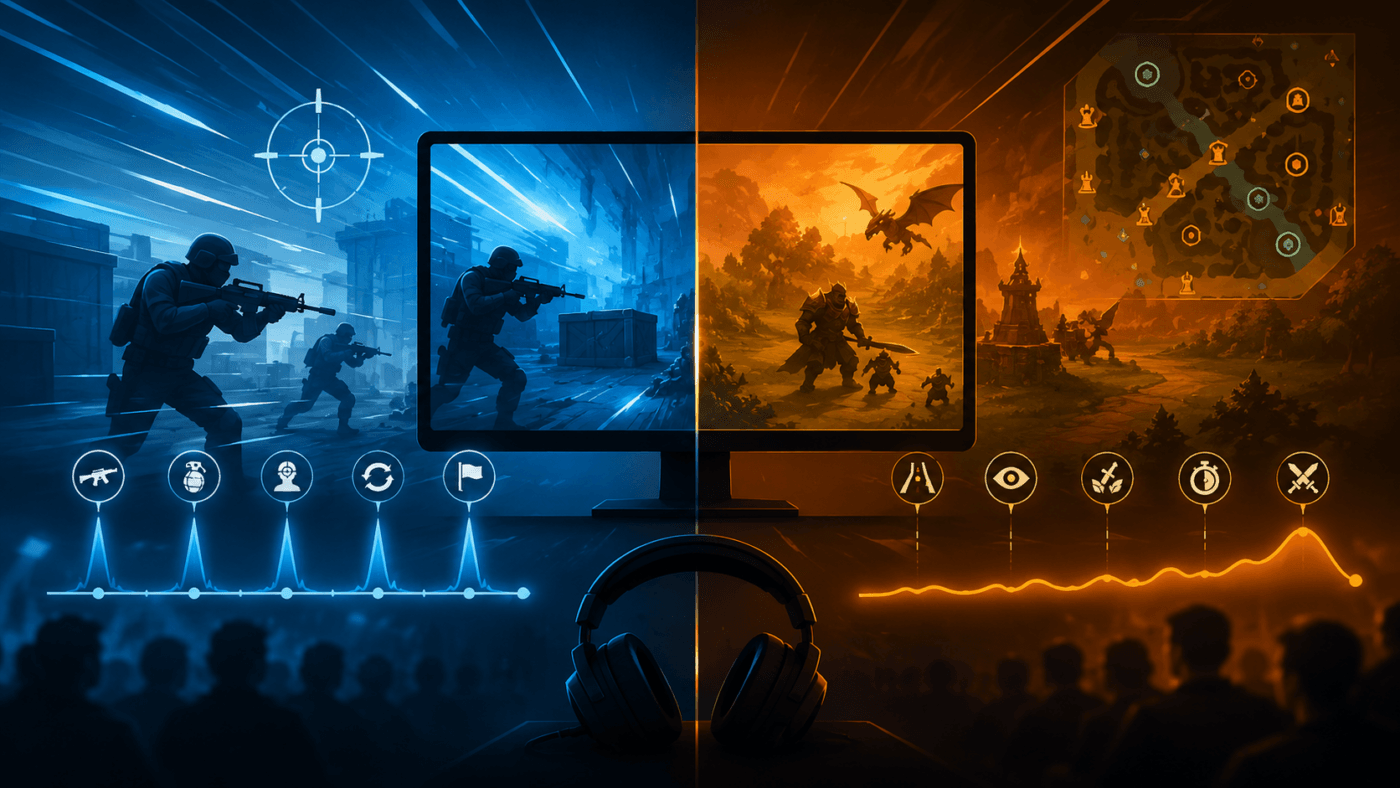
OBS Studios is one of the oldest and most popular tools available online for live streaming, and we recommend using it for live streaming content across all platforms, including YouTube, Twitch, Kick and Facebook Live.
It’s the most versatile of the available broadcasting software, allowing you to add overlays to your stream, alerts, events and even chat overlay’s.
Overall, we thought that Boban Tasevski offered lots of helpful tips for streaming with OBS, so hopefully you’re now better equipped for streaming great content with the software. Thanks for reading, and happy streaming!
Visit Hexeum’s Store Today
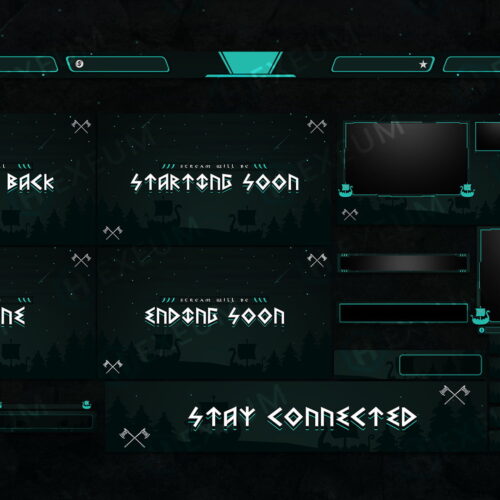
While ensuring that you’re utilizing all of the best settings and tools to make sure your stream is running as best as possible, having a great stream overlay is also important. Thankfully, Hexeum has got you covered there – Hexeum’s website offers a large library of custom designs that can help elevate your live stream and really stand out from the crowd. With tons of original overlays, animated alerts, banners, and widgets, Hexeum can satisfy all of your channel’s design needs. If you’re looking for ways to improve your channel, then look no further – visit Hexeum’s store today!