

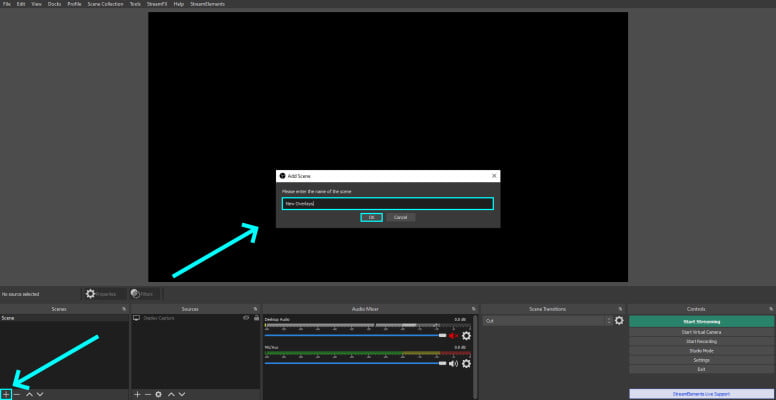
Launch OBS. Create a new scene with the + button. Or activate an existing scene by clicking it. Give it a name for and hit OK.

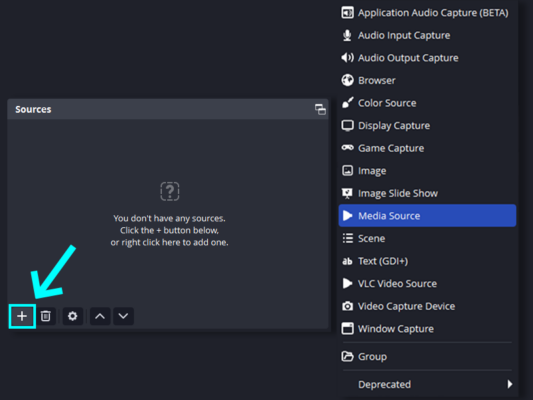
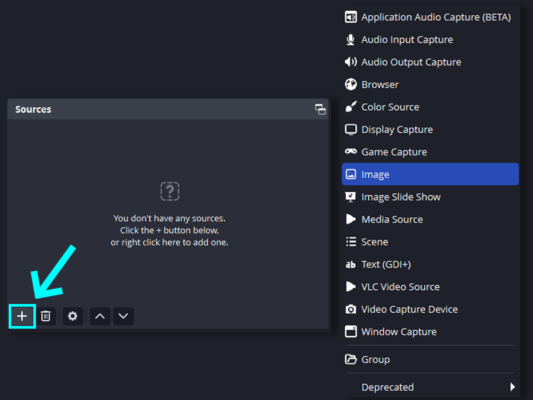
Create a new media source using the + Icon within the sources section. Choose a media source from the list.
You can also create a media source in OBS by right clicking in the Sources section and clicking, Add -> Media Source.
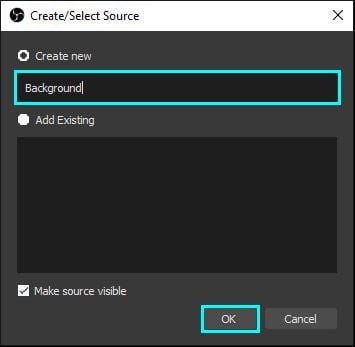
Click Create New, enter a name and press OK.
* Scenes can quickly become complex. Name the sources logically to maintain organization.

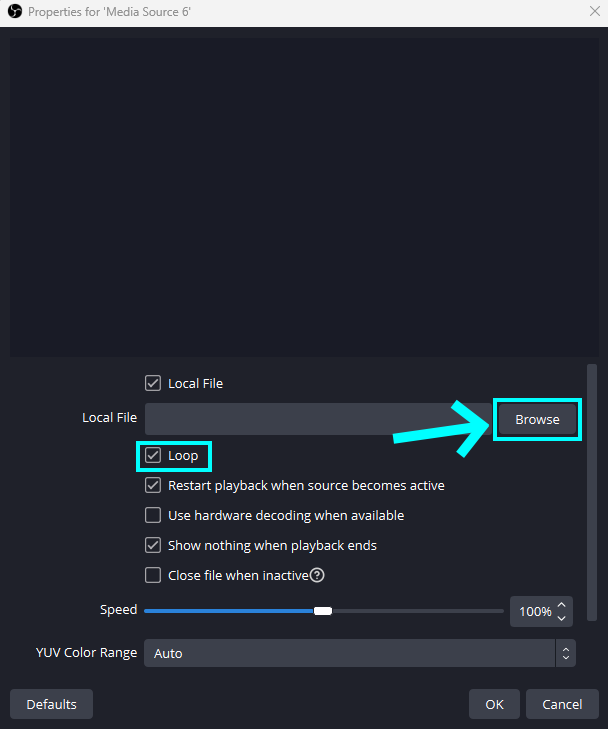
Click Browse from the properties dialog and choose your animated overlay file. WebM is the best format for animated files in OBS. Enable the Loop to make sure the animation loops indefinitely.
If you don’t see a browse button in the properties window, confirm that Local File checkbox is enabled.

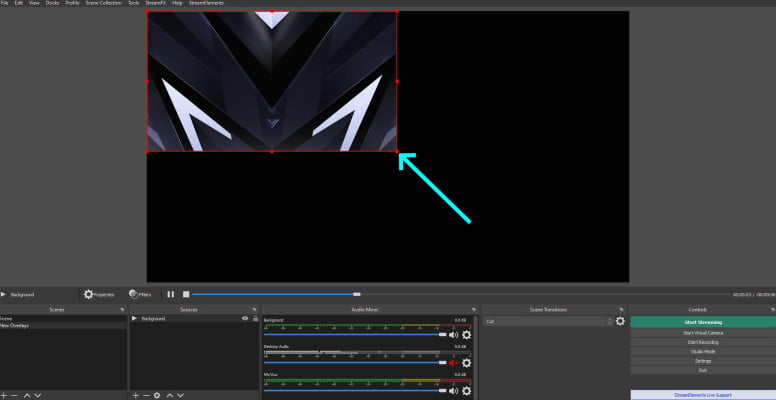
To resize a source quickly, right click it in the preview window and select Transform -> Fit To Screen. You can resize manually, by dragging left click on the corners. You’ll notice that OBS maintains the aspect ratio of the overlay when you resize.
Hold Shift + Left Click when resizing if you don’t want to lock the aspect ratio.
Holding Alt + Left Click whilst dragging the corners will crop the overlay source.

There are some cases where animated overlays would be overkill and in those cases it’s much better to use a static image overlay instead. Adding an image overlay to OBS will require the use of an image source.
OBS maintains a list of all the image source supported file types so make sure you get overlays in a supported format.
Let’s take a look at how to add an image overlay to OBS with the steps below.
Add a new source using the + button in the Sources section. Choose Image from the list.
Name the source and press OK.
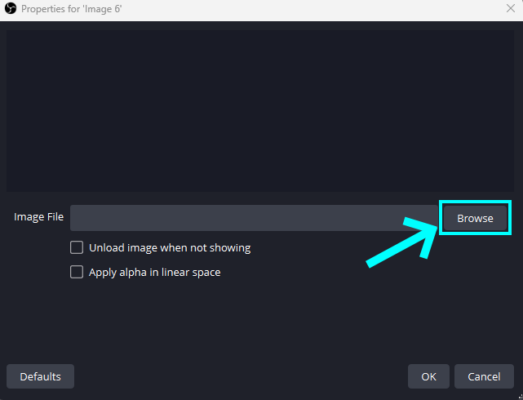
Click Browse and select your static image overlay. Click Ok.

- If the image needs resizing you can follow the same process as animated overlays.

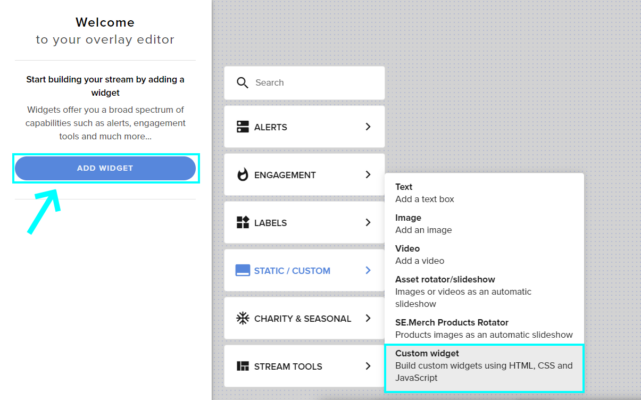
Head over to your Streamelements dashboard. Expand the sidebar on the left, then expand Streaming Tools -> Overlays.

Select the New Overlay button. This opens the overlay editor in a new tab.
Set resolution to 1080p from the dropdown and click Start.
Select Add Widget -> Static/Custom -> Video. This adds a new video element to the canvas.

Click the newly added layer, and select Change Video.
Click Upload -> Select Files in the top right of the dialog. Choose the animated overlay file. Once uploaded, find the file and press Submit.
Enable Scaled To Fit and the Loop setting. Expand the Position, size and style section.
Set Width 1920 and Height 1080 and Center Widget. This makes the video overlay fit the whole canvas.
Finish off by clicking Save
Copy Overlay URL using the link in the top bar.
Launch OBS studio and create a new scene with + icon in Scenes section. Name the scene and press OK

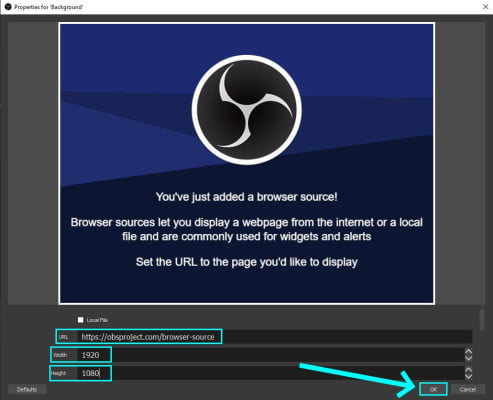
Press the + button within the scenes section and choose Browser Source from the list.
Name the new source and press OK.
Paste the URL we copied in step 10 into the URL section of properties dialog. Set Width 1920 and Height 1080. Press Ok to add Streamelements overlay to OBS.


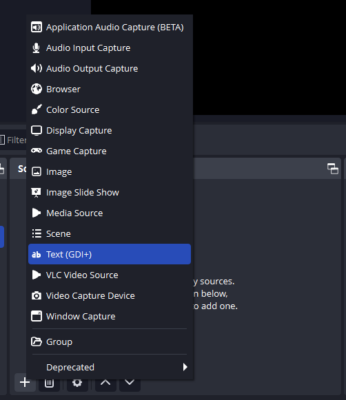
- Launch OBS studio. Select the + button from the sources section. Choose Text(GDI+) from the list of options. Name it and hit OK

- Select Pick a font and choose a font that’s consistent with your brand
- Enter text into the text field, or alternatively you can use text from a .txt file. The latter option is a great feature, especially when used for leaderboards or top donator rolling lists.
- Enable Anti Aliasing for even smoother edges. This can cost a little performance so be wary.