
Setting up donations with Streamlabs involves a few straightforward steps:
- Create or Log In to Your Streamlabs Account: If you don’t already have a Streamlabs account, create one. If you do, just log in.
- Link Your Twitch Account: Connect your Streamlabs account to your Twitch account. This can be done through the Streamlabs dashboard -> Account -> Settings, by selecting the option to link your Twitch account.
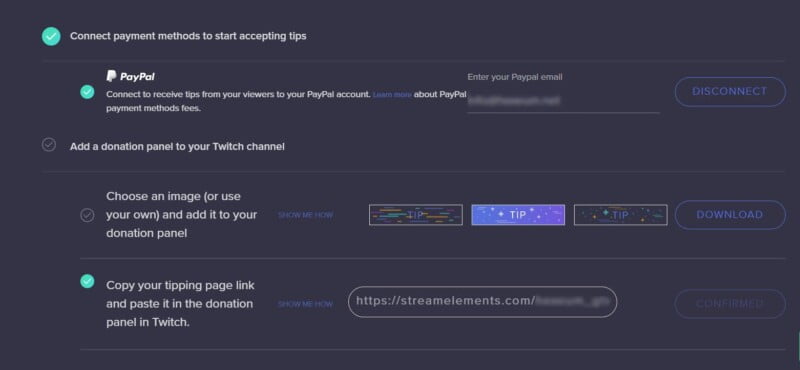
- Set Up Your Donation Settings: In the Streamlabs dashboard, navigate to the ‘Donation Settings’ section or “Tipping” as it’s displayed in the sidebar. Here, you can configure your donation settings, including payment methods.
- Choose Payment Methods: Select the payment methods you want to accept for donations, such as PayPal, credit cards, and other available options.
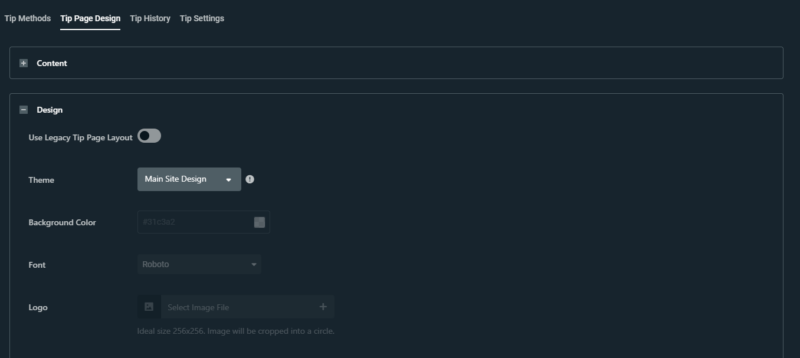
- Customize Your Donation Page: Streamlabs allows you to customize your donation page. You can add personalized messages, images, or thank you notes to make the page more engaging for your donors.

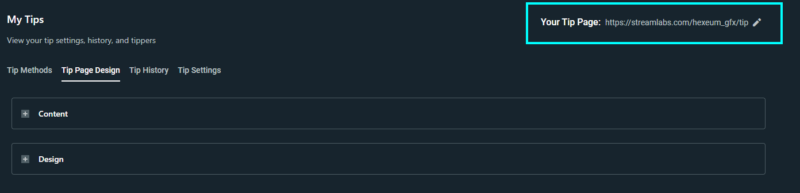
- Add Donation Link to Your Twitch Channel: Once your donation page is set up, copy the donation link provided by Streamlabs. add the donation link to your Twitch channel. For detailed steps on this, see “How To Add A Donate Button To Your Twitch Channel”

- Test the Donation Process: It’s a good idea to test the donation process to ensure everything is working correctly before going live.
To set up a donations page on StreamElements follow the steps below.
- Create or Log In to Your Account: Head over to StreamElements and log in.
- Link Your Twitch Account: Connect your StreamElements account to your Twitch account. This can be done through the Streamelements dashboard by clicking your profile avatar and navigating to your account settings.
- Link To PayPal: In the Streamelements dashboard, navigate to the Revenue -> Tipping Settings from the sidebar. Here, you can configure your donation settings by linking to your PayPal account.

- Customize your Donation Page: Streamelements allows you to customize your donation page. You can add personalized messages, images, or thank you notes to make the page more engaging for your donors.
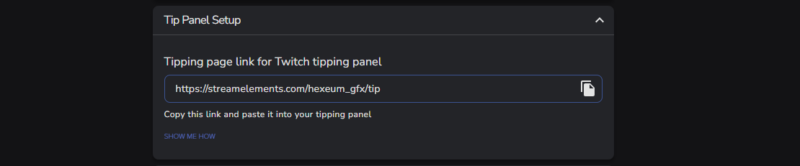
- Add Donation Link to Your Twitch Channel: Once your donation page is set up, copy the donation link provided by Streamelements. add the donation link to your Twitch channel. For detailed steps on this, see “How To Add A Donate Button To Your Twitch Channel”

- Test the Donation Process: It’s a good idea to test the donation process to ensure everything is working correctly before going live.
To set up PayPal donations with Twitch:
- Create a PayPal Account: If you don’t have one, sign up for a PayPal account.
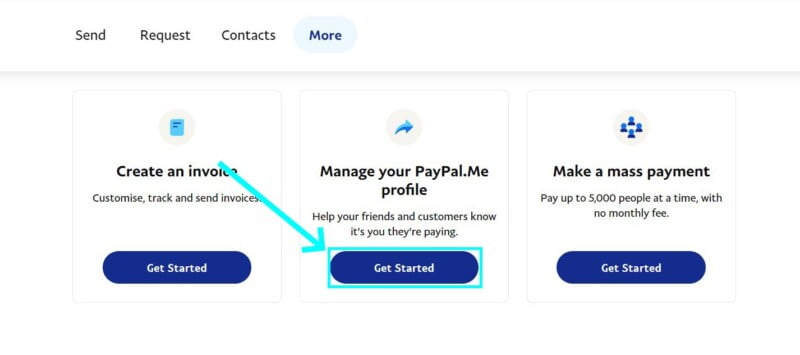
- Setup Paypal.me: Once logged in head over to the Pay & Get Paid from menu then select the More tab. Select Get Started under the Manage your PayPal.Me profile section.

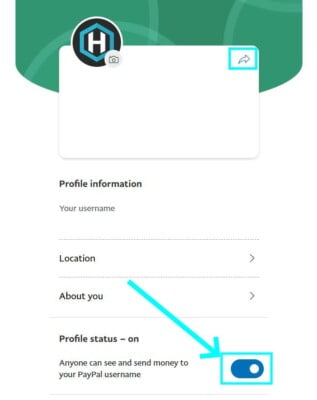
- Enable Your Profile: Once set up, you’ll need to make sure your profile status is set On.

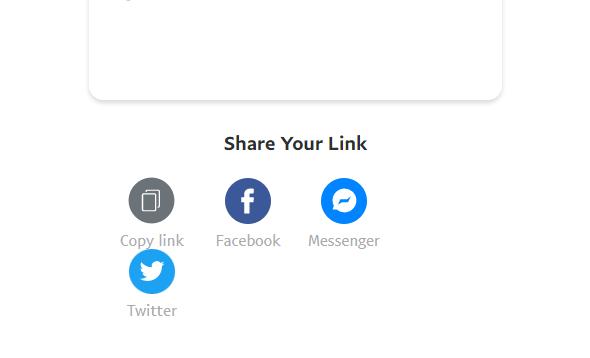
- Get Your Donation Link: Select share from the top right. Share your PayPal donation link with your viewers and encourage support during your streams. Scroll down and find the Copy Link button.

- Add Donation Link to Your Twitch Channel: With the link copied, add it to your Twitch channel. For detailed steps on this, see “How To Add A Donate Button To Your Twitch Channel”
To add a donation panel/link to your Twitch channel, follow these summarized steps:
- Log into Twitch: Access your account by logging in.
- Navigate to Your Dashboard: Go to your Twitch Creator Dashboard.
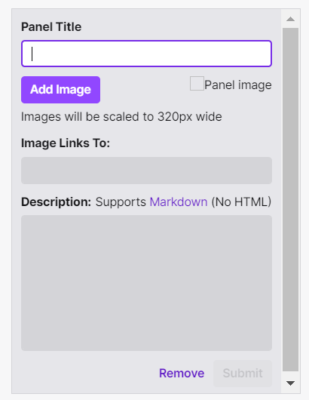
- Edit Your Panels: Click on the “Channel” tab, select “About” from the dropdown menu, and then choose “Edit Panels.”
- Create a New Panel: Click the “+” button to add a new panel.
- Set Title and Description: Enter a title and description for your donation panel, clearly explaining its purpose.

- Insert Donation Link or Image: Use the “Add Image or URL” option to add your donation link, button, or image, ensuring your donation URL is included.
- Customize the Panel: Adjust the panel’s appearance, including color, text, and layout, to fit your channel’s theme.
- Save Your Panel: Once you’re happy with the panel’s look, save your changes.
- Rearrange Panels: If necessary, rearrange your panels to your liking by dragging and dropping them into place.
- Activate the Panel: Make sure your new panel is enabled by toggling it on.
- Test Your Donation Link: Click on the panel to test if the donation link works correctly, ensuring it leads to the appropriate donation page.
- Publish Your Changes: Finalize your updates by clicking “Done,” making your new donation panel live on your channel.